(Previous Topic: Mapping Sales Information)
Setting Up Payments
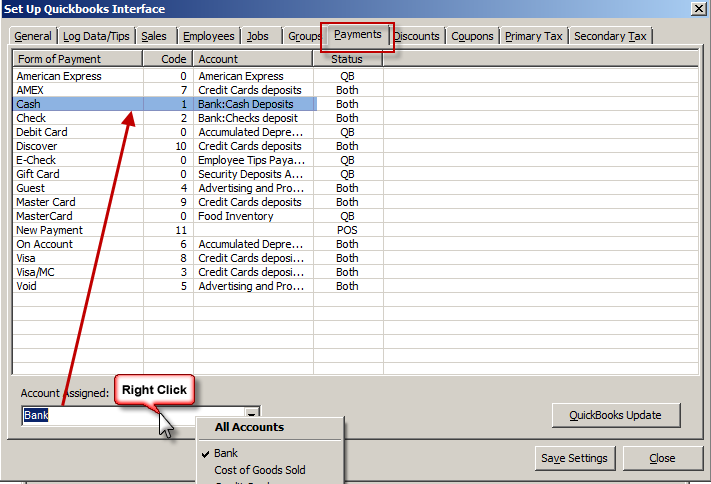
Entries in the Method of Payment Setup Form in the BackOffice are going to be listed on the display grid under the Payments Tab display grid in POSQBi.
Though, in QuickBooks, there is no account being assigned, in the interface (POSQBi), account assigned stipulates the name of the account to be used in submitting the amount of payments received in Restaurant Manager.
Further, the relationship between the Method of Payment in the BackOffice and the Methods of Payments in QuickBooks is name-based. This link could be broken by changing the name or description either in the BackOffice or in the QuickBooks user interface.
All forms of payments found in the BackOffice Module will be displayed on the list regardless if the are enable or not.
The Account Assigned function by default displays all accounts available in QuickBooks. However, this function can be configured to display certain account types by right clicking on the field and choosing a specific account type (i.e. bank). This is convenient when configuring multiple data fields within the same programming session (typically occurs with initial installation).
To change or add a payment type account assignment:
- Click on a payment type.
- Right-click on the Account Assigned box and select the appropriate account type for the payment type to be changed.
- Click again and select the proper account to assign.
- Review the changes.
- If satisfied, click on the Save Settings button.
If there is any form of payment of the type POS then click on the QuickBooks Update button to have these also saved in QuickBooks.
Note: In the BackOffice, you can set-up the payment types in Set-Up->General->Forms of Payment or for more information on setting up forms of payments refer to the BackOffice documentation. Refer to QuickBooks reference manual for more information on setting up accounts.